
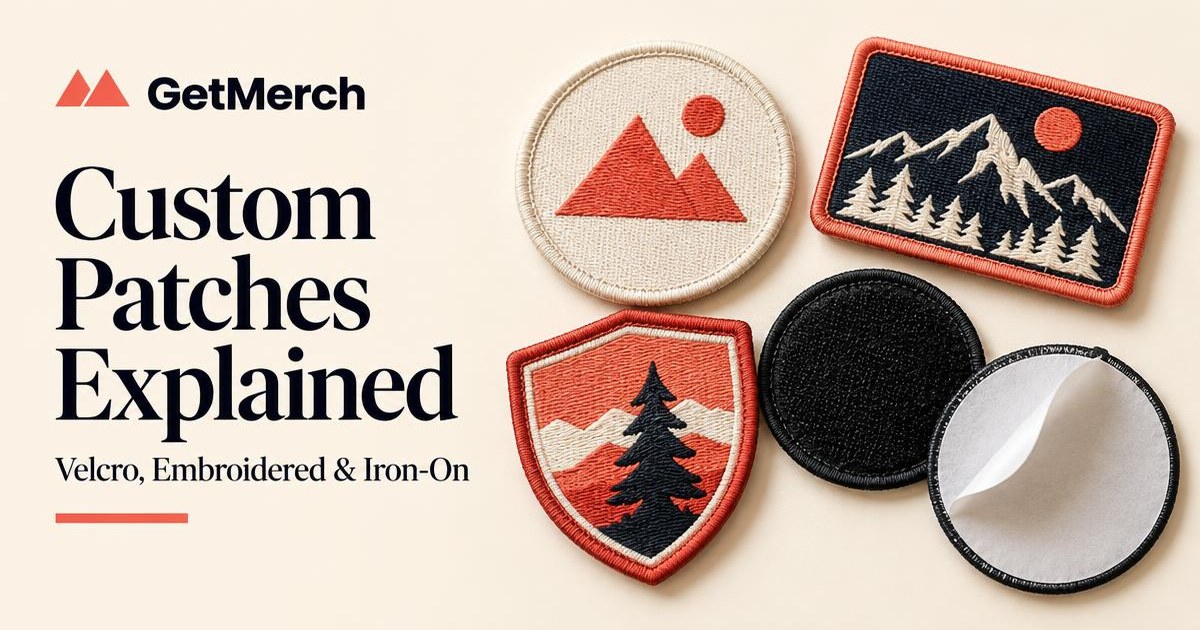
Custom patches come in three common backings: velcro (hook-and-loop) for removable uniforms and hats, iron-on for quick permanent application to fabric, and sew-on for the most durable hold. GetMerch helps you pick the backing and embroidered or printed face that fit the garment, redraws low-resolution logos, and sends a digital proof before production.
What are the main types of custom patches?
Custom patches are defined by two choices: how the face is made and how the patch attaches. The face can be embroidered, where thread forms the design and a stitched border finishes the edge, or printed for artwork with fine detail. The attachment can be velcro, iron-on, or sew-on. Most buyers choose the attachment first because it determines where the patch can be worn and whether it can ever be removed.
An embroidered face has a raised, textured, durable look that suits team logos, crests, name tags and badges. A printed face is flatter and can hold smaller detail, but it does not have the dimensional feel of thread. Matching the face to the artwork is the most important design decision after the backing.
Velcro vs. iron-on vs. sew-on: which backing should I choose?
Velcro custom patches use a hook side on the patch and a loop side sewn onto the garment, so the patch can be removed and swapped. That makes them common for uniforms, hats, bags and gear where roles or ratings change. Iron-on patches use a heat-activated adhesive for quick permanent application, and sew-on patches rely on stitching for the strongest long-term hold on heavy fabrics.
| Backing | Best for | Removable? | Main consideration |
|---|---|---|---|
| Velcro (hook-and-loop) | Uniforms, hats, bags, swappable roles | Yes | The loop panel must be sewn onto the garment |
| Iron-on | Quick application to cotton and similar fabrics | No, designed to be permanent | Heat-sensitive or textured fabrics may not bond well |
| Sew-on | Heavy-duty jackets, bags and workwear | Only by removing stitches | Needs sewing for the best hold |
Which patch border and shape work best?
A merrowed border wraps thread around the edge for a classic rounded finish, while a laser-cut or hot-cut edge can follow more complex shapes. Simple shapes such as circles, rectangles and shields are easiest to read and apply. Highly irregular outlines with thin protrusions are more likely to fray or curl, so a simple border usually looks sharper and lasts longer.
Think about where the patch will sit. A curved cap panel, a flat jacket sleeve and a backpack strap each tolerate different sizes and shapes. Choose a size that leaves breathing room around the patch rather than filling the entire surface.
How detailed can patch artwork be?
Embroidered patch artwork works best with bold shapes, clear color separation and short text. Thin lines, tiny lettering and gradients do not translate directly into thread, because stitches have physical width. Simplifying a complex logo into a few solid thread colors usually gives a stronger result than trying to reproduce every subtle shade.
If the logo contains photographic detail or very fine type, ask about a printed face instead. GetMerch can review the artwork at its actual patch size and recommend which details to enlarge, combine or remove before production.
What file format should I send for custom patches?
Vector files in AI, EPS, SVG or high-resolution PDF format are preferred because they scale cleanly and separate into colors without pixelation. Convert fonts to outlines when possible and note any brand colors that must match. If you only have a low-resolution JPG or PNG, send the best original you have. The GetMerch design team can redraw it into clean production artwork, and you review the result on a digital proof.
How many custom patches should I order and how long does it take?
Start with a named headcount and add spares for replacements, new members and giveaways. Embroidery has no strict minimum order, so a small group can order what it needs. Per-piece pricing improves at 12 or more pieces, which makes one coordinated order more efficient than several small reorders. Custom apparel typically ships about 14 days after proof approval, and rush production is available when the schedule is tight. Share your in-hand date when you request a quote.
How do I order custom patches step by step?
A clean order moves from use case to approved proof in six steps:
- 1. Decide where the patch will be worn: hat, jacket, uniform, bag or gear.
- 2. Choose the backing: velcro for removable, iron-on for quick permanent, sew-on for maximum durability.
- 3. Choose the face: embroidered for bold dimensional artwork, printed for finer detail.
- 4. Send vector artwork in AI, EPS, SVG or high-resolution PDF, or ask GetMerch to redraw a low-resolution logo.
- 5. Confirm quantity and deadline. Per-piece pricing improves at 12 or more pieces, and custom apparel typically ships about 14 days after proof approval.
- 6. Review the digital proof and check spelling, colors, border, size and backing before approving production.
What usually goes wrong with a first custom patch order?
The most common problems are artwork with lines too thin to stitch, text too small to read from a normal distance, and a backing that does not match how the garment is used. Another frequent issue is approving a design without checking spelling or the patch's real size on the garment. Reviewing the digital proof as a physical object, not just a graphic, prevents most of these.
Keep the design restrained. A patch with one clear symbol, high contrast and a clean border will outlast a crowded design and look more professional on a garment.
Custom patches work when the backing, the face and the artwork all match how the patch will be worn. Pick velcro, iron-on or sew-on for the garment, keep the design bold enough for thread, and use the proof to judge the real object. GetMerch can help with each decision, from redrawing the file to confirming the production plan.